Sentry collects errors from my applications. After a notification, I check the error and ask the agent to explain its cause before fixing it.
Here is how to configure Sentry MCP with Claude Code, then use sentry-cli, which I now prefer. Spring Boot errors from MotorTrack illustrate this workflow, which also applies to my other projects.
1. Configure Sentry MCP in Claude Code
MCP (Model Context Protocol) lets the agent query Sentry. Your application must already be sending its errors there.
Prerequisites
Open the project in VS Code, with Claude Code installed and authenticated, and Node.js and npm available in the integrated terminal. Have a Sentry personal token and your organization slug ready (the short identifier in the Sentry URL). Create the token under Settings → Developer Settings → Personal Tokens, covered in section 5.
Add Sentry to Claude Code's .mcp.json
Create .mcp.json at the project root. If it already exists, add only the sentry entry under mcpServers:
{
  "mcpServers": {
    "sentry": {
      "command": "npx",
      "args": [
        "-y",
        "@sentry/mcp-server@latest",
        "--access-token=YOUR_SENTRY_TOKEN",
        "--organization-slug=YOUR_ORGANIZATION"
      ]
    }
  }
}
Claude Code starts the server locally through npx, included with npm. Replace the placeholders and do not commit the file containing your real token.
From the project root, run claude, approve the MCP configuration if prompted, then enter /mcp to check Sentry's status. This setup authenticates with the supplied token, rather than OAuth.
Alternative: configure Sentry MCP in VS Code
VS Code's built-in MCP client uses .vscode/mcp.json, the servers key and the local stdio transport:
{
  "servers": {
    "sentry": {
      "type": "stdio",
      "command": "npx",
      "args": [
        "-y",
        "@sentry/mcp-server@latest",
        "--access-token=YOUR_SENTRY_TOKEN",
        "--organization-slug=YOUR_ORGANIZATION"
      ]
    }
  }
}
Start the server using VS Code's MCP controls and accept the trust prompt if it appears. Keep the real token out of Git here too. For Codex or another agent, adapt the configuration to its own format.
Test the connection between Claude Code and Sentry
Ask the agent:
Using Sentry MCP, look up issue ISSUE_ID in organization ORGANIZATION and project PROJECT. Report its title, last occurrence and exception. Do not modify any files.
ISSUE_ID is the short issue identifier shown in Sentry, such as YOUR-PROJECT-2F. Compare the answer with Sentry and check that a Sentry tool was called. If the server fails to start, check the JSON syntax, access to npx and startup messages. If access is denied, check the token, its permissions and the target organization.
Sources: Claude Code MCP configuration and VS Code MCP formats.
2. Check the reported error
On MotorTrack, exceptions and logs from the Spring Boot backend reach Sentry. After a notification, I check the context there rather than starting with server logs.
A common case is an API call with incorrect or missing arguments. Code I write with an agent is no exception: production use still reveals defects.
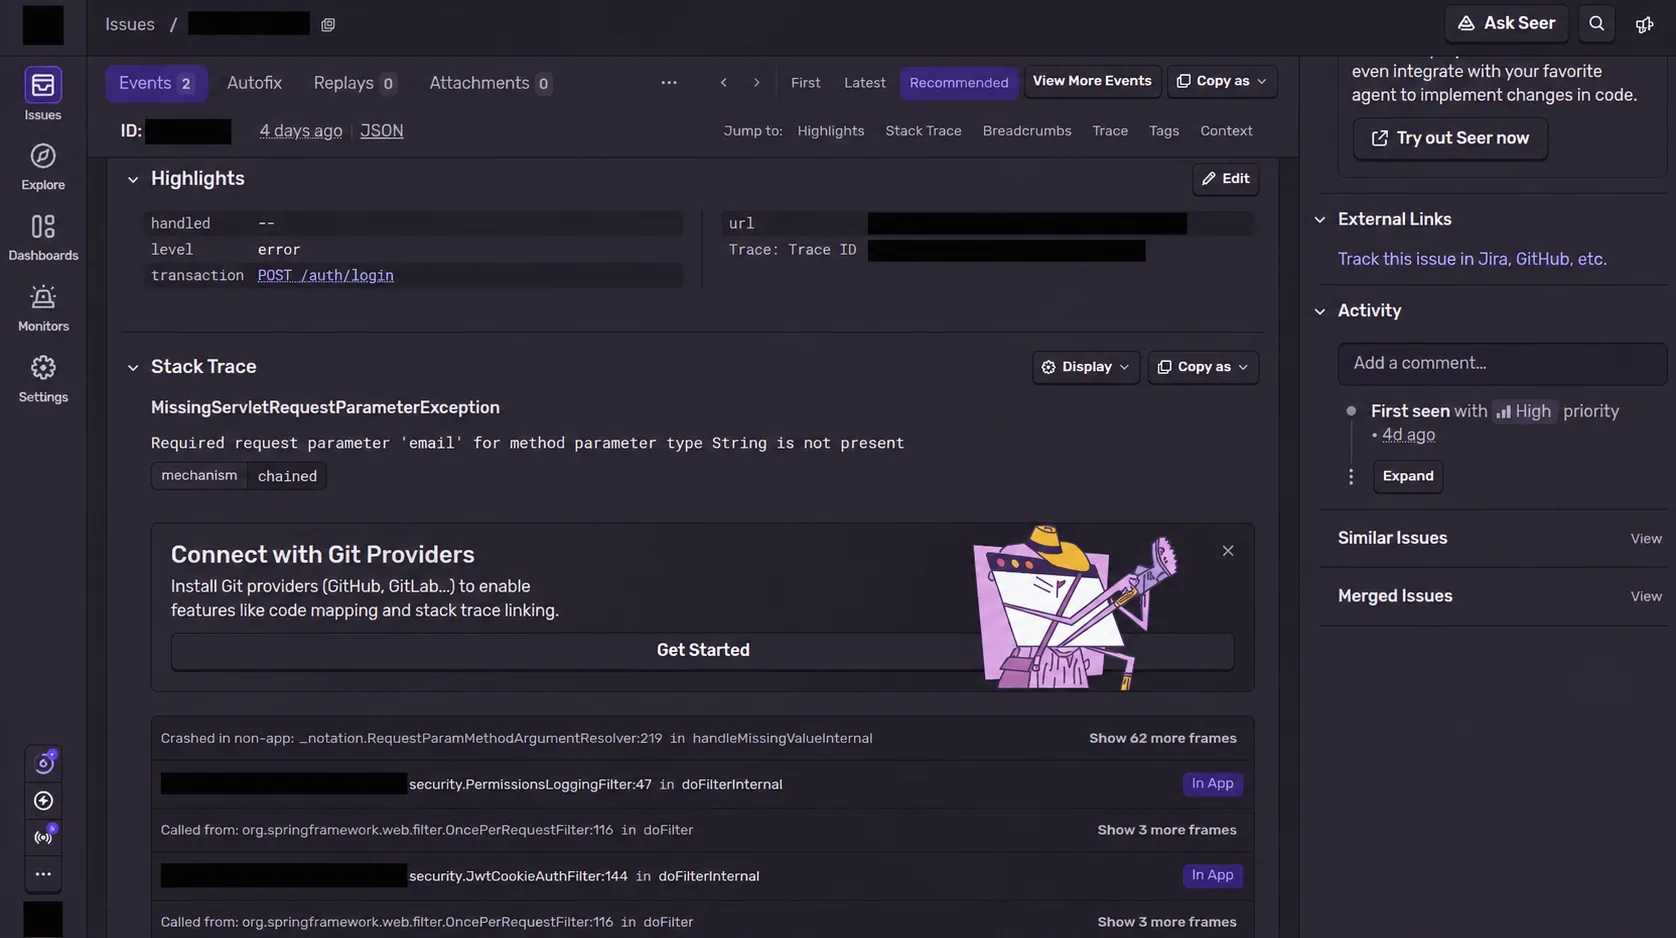
MotorTrack example: Spring reports a missing required email parameter. The domain, identifiers and internal packages are hidden. The screenshot shows the exception and stack trace, not the associated logs.
The error tells us what is missing, but not why. We still need to examine the request and the code handling it.
3. Analyze a Sentry error with Claude Code
After checking the error, I ask the agent to look it up, or review the project's latest errors. For example:
Look up Sentry issue ISSUE_ID in project PROJECT. Explain what you observe and relate the information to the code. Distinguish facts from hypotheses, then describe the likely cause and proposed solution before making changes.
The agent should identify its sources and any missing information.
4. Fix and verify
After diagnosing the issue, the agent changes the code. Reproduce the problem where possible, then test the fix and related cases. Monitor Sentry after deployment: the immediate absence of an alert does not prove the issue is resolved.
5. Switch from Sentry MCP to sentry-cli
I now use sentry-cli instead of MCP and ask the agent to run commands. This applies to Claude Code, Codex or any agent able to execute them. MCP also works in a terminal; MCP and the CLI do not necessarily provide the same information.
Install sentry-cli
With Node.js and npm installed, run:
npm install -g @sentry/cli
sentry-cli --version
The agent must be able to run sentry-cli --version in its environment.
This guide uses sentry-cli (@sentry/cli), which is distinct from the newer sentry CLI.
References: official @sentry/cli package and installation of the newer Sentry CLI, accessed October 15, 2026.
Configure sentry-cli for a project
The version used for this guide is sentry-cli 3.8.0. Create .sentryclirc at the project root to set the default target:
[defaults]
url=https://sentry.io
org=YOUR_ORGANIZATION
project=YOUR_PROJECT
Use the slugs from the Sentry URL. These defaults avoid repeating --org and --project.
In Sentry, open Settings → Developer Settings → Personal Tokens, then Create New Token.
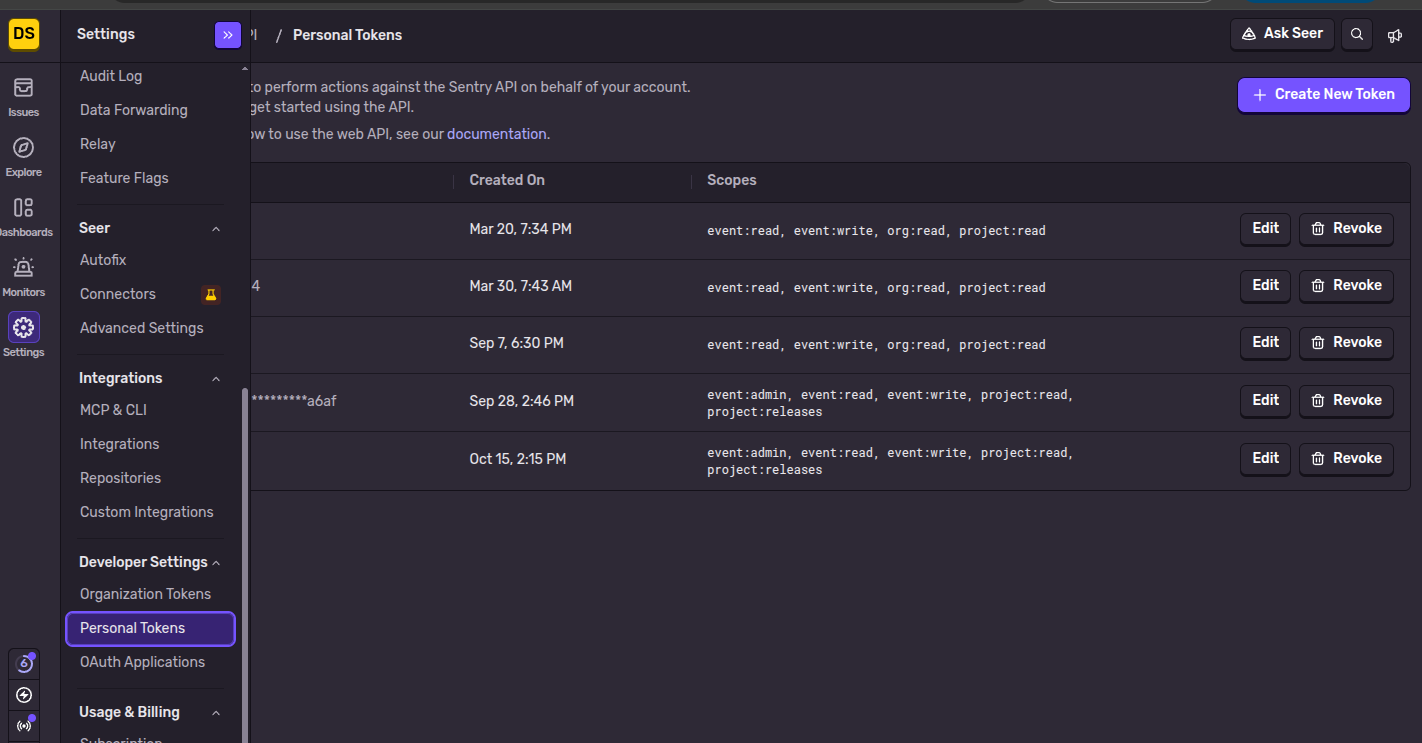
Personal Tokens lets you create and manage tokens. The scopes shown reflect my configuration. No complete token is visible.
Limit permissions to the operations you need. issues resolve and issues mute modify issues.
To keep the secret outside the repository, create a file such as ~/.config/sentry-cli/env:
SENTRY_AUTH_TOKEN=YOUR_SENTRY_TOKEN
Load it in the terminal before running the CLI:
set -a; source ~/.config/sentry-cli/env; set +a
Check the configuration:
sentry-cli info
Check the account, organization and project shown.
Query errors
Two read commands cover this workflow:
# Unresolved issues with error severity
sentry-cli issues list --query "is:unresolved level:error" --max-rows 10

# Latest received events
sentry-cli events list --max-rows 10
--query uses Sentry search syntax. These lists return identifiers, titles and dates; the issue list also includes status and severity.
What these CLI commands leave out
The lists above do not include stack traces or detailed request context. Open the event in Sentry to complete the investigation. These commands alone therefore do not fully replace MCP's functionality.
Why I now prefer the CLI
I find the CLI more responsive and suspect it uses fewer tokens, without having measured this for Sentry. Anthropic explains that tool descriptions occupy context: loading them on demand can save tokens while adding a search step.
A Scalekit benchmark reports lower CLI token usage across five GitHub tasks, but presents only one run per task; MCP is faster on one of them. No gain is guaranteed for Sentry. Compare equivalent investigations: shorter output may also provide less information. Both tools run locally here and query Sentry remotely.
Sources accessed October 15, 2026.
The key is to start with an observed error and have the agent explain its diagnosis before fixing it. Sentry provides production context, the agent connects it to the code, and verification helps assess the fix.